
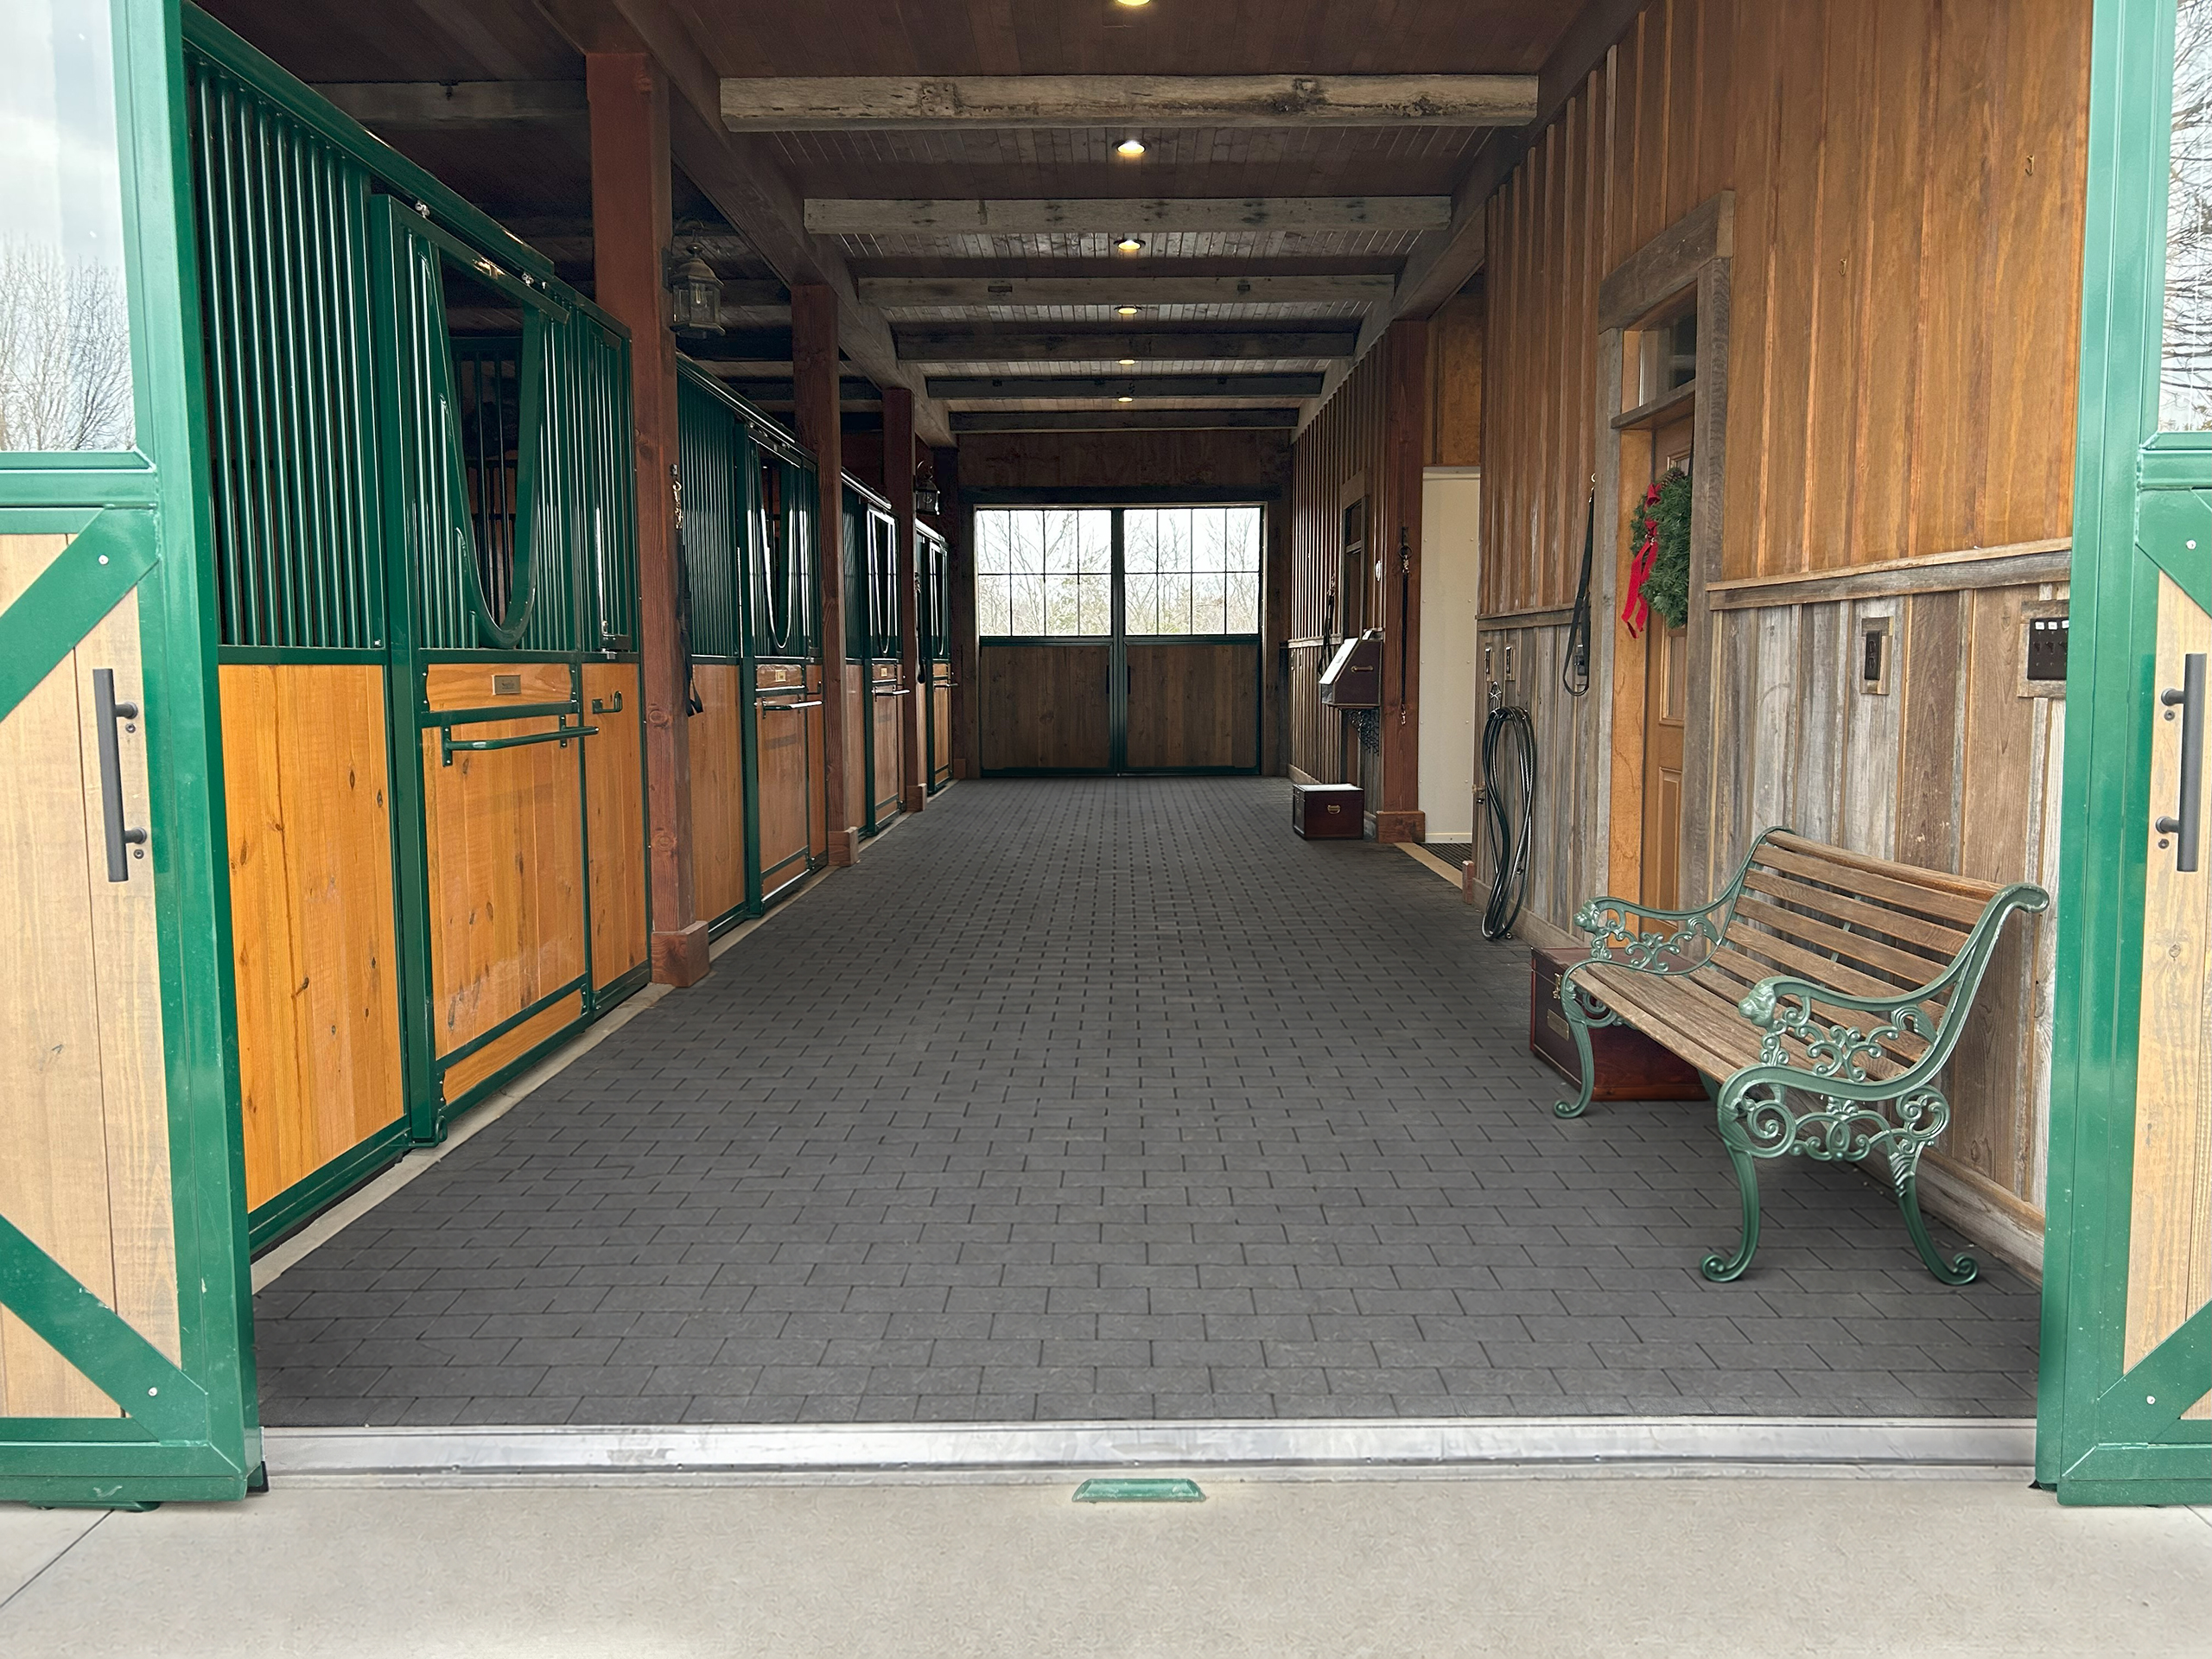
Proper installation is key to getting the best performance from your rubber pavers. A stable, level base, adequate drainage, and secure perimeter restraint will help prevent movement and settling while creating a smooth, long-lasting finished surface.
Our interlocking dog-bone rubber pavers can be installed over several properly prepared surfaces, including concrete, asphalt, and compacted aggregate bases.
Before You Begin
Before installation, determine:
- Whether you are installing 20mm or 40mm pavers
- The type and condition of the existing surface
- How water will drain from the area
- Whether horses, vehicles, tractors, trailers, or heavy equipment will use the surface
- How the perimeter of the installation will be restrained
For areas that will experience horses, vehicles, tractors, or other heavy use, we recommend 40mm rubber pavers.
What You’ll Need
Depending on the installation, you may need:
- Rubber pavers
- Measuring tape
- Chalk line or string line
- Straightedge
- Rubber mallet
- Utility knife or appropriate power saw for cuts
- Compaction equipment for aggregate installations
- Crushed stone or other suitable aggregate base material
- Leveling material as required
- Edge restraints or curbing
- Broom
Step 1: Prepare the Area
Remove loose material, vegetation, debris, and anything that could interfere with the finished surface.
The finished base should be:
- Stable
- Smooth
- Level and consistent
- Properly compacted where applicable
- Designed to drain water away from buildings and other structures
Rubber pavers will follow irregularities in the surface beneath them, so base preparation should be completed before installation begins.
Installing Over Concrete or Asphalt
Existing concrete or asphalt can provide an excellent base as long as it is structurally sound and reasonably smooth.
Before laying the pavers:
- Clean the surface thoroughly.
- Remove dirt, loose material, oil, and debris.
- Repair significant holes or uneven areas.
- Confirm that the surface has adequate slope and drainage.
- Make sure water will not become trapped beneath the pavers.
A slight slope toward an appropriate drainage point is recommended for exterior installations. Similar commercial dog-bone rubber paver systems generally call for approximately a 1% to 2% drainage slope over bound surfaces.
Once the surface is ready, the interlocking pavers can be laid directly over the prepared base.
Installing Over a Compacted Aggregate Base
Rubber pavers can also be installed over a properly constructed aggregate base.
This is particularly useful for:
- Barn aisles
- Outdoor walkways
- Equestrian facilities
- Patios
- Dog runs
- Other areas without an existing concrete or asphalt slab
1. Excavate
Remove soil to the depth required for the base materials plus the thickness of the rubber paver.
Remember to account for the finished elevation of:
-
- 20mm pavers: approximately 3/4 inch
- 40mm pavers: approximately 1 1/2 inches
The amount of excavation and base material required will depend on soil conditions, drainage, climate, and the loads the finished surface will carry.
2. Install the Aggregate Base
Place a suitable crushed aggregate material and compact it thoroughly.
Install the material in lifts rather than placing a deep layer all at once. Compact each layer before adding additional material.
A firm, load-bearing base is especially important in locations that will experience:
-
- Horses
- Tractors
- Utility vehicles
- Cars or trucks
- Trailers
- Heavy equipment
Comparable commercial rubber-paver installation systems use substantial compacted crushed-stone bases for permeable installations because the base provides both support and drainage.
Base depth should be determined according to site conditions and intended loads rather than using one depth for every project.
3. Create a Smooth Setting Surface
The final surface should be smooth and evenly graded before the pavers are installed.
A thin leveling layer may be used where appropriate to remove minor irregularities, but it should not be used to compensate for an improperly constructed base.
Compact and screed the surface so that the pavers will sit evenly.
Step 2: Install Edge Restraints
Perimeter restraint is important for an interlocking paver installation.
Install a solid border around exposed edges using an appropriate:
- Concrete curb
- Paver edging
- Structural frame
- Wall
- Threshold
- Other secure edge restraint
The restraint helps prevent the outside rows from moving and maintains the interlock across the entire surface.
This is especially important in areas subjected to turning vehicles, tractors, horses, or other lateral loads.
Step 3: Establish Your Starting Lines
Use a chalk line or string line to create straight reference lines.
Do not rely solely on surrounding walls or structures being perfectly square.
Check your layout before beginning so that you can minimize small cuts around visible edges.
Step 4: Lay the Rubber Pavers
Begin along your established reference line and place the pavers tightly together.
The dog-bone shape allows adjacent pavers to interlock as the installation progresses.
As you work:
- Keep the pavers tight against one another.
- Maintain straight rows.
- Check alignment frequently.
- Correct small alignment issues before continuing.
- Use a rubber mallet as needed to seat individual pavers.
Periodically check the installation with your chalk or string lines to make sure the pattern remains square.
Step 5: Tighten the Installation
Every few rows, check for gaps and tighten the field of pavers.
A common technique is to place a board against the exposed row and gently tap the board to push the pavers together evenly rather than striking individual edges aggressively.
The goal is a tight, consistent interlock across the entire area.
Step 6: Cut Perimeter Pavers
Pavers around walls, posts, drains, doorways, or irregular edges may need to be cut.
Measure carefully and create snug-fitting perimeter pieces.
Depending on paver thickness and the type of cut, pavers may be cut using an appropriate utility knife, saw, or other rubber-cutting equipment.
Whenever possible, place factory edges against neighboring pavers and cut edges against perimeter restraints for a cleaner finished appearance.
Step 7: Finish the Edges
Complete the installation by making sure all perimeter pavers fit tightly against the edge restraint.
Avoid leaving unsupported outside edges where repeated traffic can push the pavers outward.
Transitions between the rubber surface and adjacent flooring should be smooth and appropriate for the way the space will be used.
Installing Rubber Pavers in Areas With Vehicle or Tractor Traffic
For areas that will be driven over, 40mm pavers should be used.
The pavers themselves are designed for demanding applications, including high-traffic surfaces and environments exposed to tractors, but the performance of the finished system depends heavily on the supporting base.
For vehicle-use areas:
- Build a load-bearing, properly compacted base.
- Avoid soft or poorly compacted subgrade.
- Provide positive drainage.
- Use secure perimeter restraints.
- Make sure the installation is tight before opening the area to traffic.
- Pay particular attention to areas where vehicles will turn, brake, or repeatedly travel over the same path.
A properly prepared base is more important than simply increasing paver thickness.
Installing Rubber Pavers in Barns
For barn aisles, grooming areas, wash bays, trailer areas, and other equestrian applications, 40mm is the recommended thickness.
Before installation, consider:
- Horse traffic
- Tractor and equipment access
- Drain placement
- Wash-down water
- Door thresholds
- Stall entrances
- Existing concrete elevations
- Transitions into adjacent surfaces
Wash bays and other wet environments should be designed so that water moves toward drains rather than collecting beneath or on top of the finished floor.
Installing 20mm Rubber Pavers
20mm pavers are best suited for lighter-use applications such as:
- Patios
- Walkways
- Pool surrounds
- Residential outdoor areas
- Light-commercial spaces
They are particularly well suited to installations over an existing stable hard surface where a lower finished height is desirable.
For heavier loads, horse traffic, or regular vehicle traffic, choose 40mm instead.
Drainage Is Essential
Rubber pavers should not be used to correct an existing drainage problem.
Before installation, make sure the underlying surface directs water appropriately.
For outdoor installations:
- Slope the base away from structures.
- Avoid low areas where water can collect.
- Keep existing drains unobstructed.
- Make sure aggregate bases allow water to move away from the installation.
Proper drainage protects both the pavers and the supporting base.
After Installation
Inspect the finished surface for:
- Loose perimeter pieces
- Open joints
- High or low areas
- Uneven transitions
- Drainage problems
Individual interlocking pavers can be removed and replaced if one becomes damaged, without replacing the entire floor.
Installation at a Glance
- Prepare the surface
Start with a stable, properly graded and drained base. - Compact the base
For aggregate installations, create a firm load-bearing foundation. - Install perimeter restraints
Secure exposed edges to keep the paver field contained. - Establish straight layout lines
Use chalk or string lines to maintain alignment. - Lay and interlock the pavers
Work progressively while keeping joints tight. - Cut perimeter pieces
Fit pavers neatly against walls, curbs, drains, and transitions. - Inspect the finished installation
Check alignment, edges, transitions, and drainage before putting the surface into use.
Have Questions About Your Installation?
Every project is different. Base requirements can vary depending on soil conditions, drainage, climate, existing surfaces, and whether the area will support pedestrians, horses, vehicles, or heavy equipment.
Contact our team before installation if you need help determining the right paver thickness or preparing your project.